
If you adore citrusy sweetness with a hint of natural tang, you’re going to fall in love with this Homemade Orange Jam Recipe. It’s a beautiful celebration of fresh oranges transformed into a luscious jam that’s bursting with genuine flavor and just the right balance of sweetness and zest. Each spoonful is like sunshine in a jar, perfect for breakfast spreads, baking, or even as a delightful addition to cheese boards. Making this jam at home is incredibly rewarding and surprisingly simple when you know the steps, plus it lets you savor pure, fresh orange goodness without any additives.
Ingredients You'll Need

Getting the ingredients right is the first step toward that perfect jam texture and flavor. Each component is straightforward, but together, they create a harmony of sweetness, tartness, and natural pectin that gives the jam its signature set and shine.
- 8 large oranges: Choose ripe, juicy oranges to get both a bright flavor and enough juice; they form the core of your jam.
- 1 large lemon: Adds a fresh tartness and natural pectin essential for thickening your jam beautifully.
- 700 g sugar: This balances the citrus acidity and helps preserve your jam, giving it that classic sweet finish.
How to Make Homemade Orange Jam Recipe
Step 1: Prepare Your Oranges and Lemon
Start by setting aside two oranges and juicing the other six oranges along with the lemon halves. Don't worry if some pulp slips into the juice; it adds wonderful texture. Remember to remove and reserve the seeds — they'll play an important role soon. Keep the skins from these juiced fruits because we’ll use them after some preparation.
Step 2: Extract Pulp and Prepare Seeds
Using a teaspoon, carefully scoop out the pulp from the insides of the reserved orange and lemon skins. Bundle this pulp and the seeds inside a muslin cloth to create a natural pectin pouch, which will help your jam set perfectly without any artificial thickeners.
Step 3: Remove the Bitter Parts and Slice the Skins
With a knife or spoon, gently scrape off the white pith inside the skins — this part is bitter and can overpower your jam if left in. After that, thinly slice the cleaned orange and lemon skins. These thin strips will add a lovely texture and subtle citrus flavor to your jam.
Step 4: Prepare the Remaining Oranges
Take the last two oranges, peel them completely removing any zest or white parts, and chop the flesh roughly. These bold chunks are going to give your jam some delightful body and bursts of fresh citrus flavor.
Step 5: Combine All Ingredients Before Cooking
In a large bowl, mix together the freshly squeezed orange and lemon juice, the sliced skins, and the chopped orange pieces. Now, squeeze the muslin pouch over this mixture to release the natural pectin from the seeds and pulp — this is the magic that thickens your jam naturally.
Step 6: Measure and Add Sugar
Weigh your mixture on a kitchen scale for accuracy; it should be around 700 grams. Pour this into a large pot and add the exact same amount of sugar (700 grams) for a perfectly balanced sweetness and consistency.
Step 7: Cook Until Thickened
Place your pot on high heat and bring the mixture to a boil, stirring occasionally. Simmer it for 20 to 30 minutes until the jam thickens noticeably. Keep an eye on the consistency to avoid burning at the bottom.
Step 8: Perform the Plate Test
Once the cooking time is up, reduce the heat to low and do the classic plate test: drop a spoonful of jam on a cool plate and refrigerate it for 10 minutes. If the jam doesn’t run when you tilt the plate, it’s ready. If it’s still too runny, cook for an additional five minutes and test again.
Step 9: Cool and Store Your Jam
Remove the jam from heat and let it cool in the pot — it will continue to thicken as it cools. When completely cooled, transfer it to clean jars for storage. If you like, sterilize your jars and pour the hot jam directly into them for longer shelf life.
How to Serve Homemade Orange Jam Recipe

Garnishes
Adding garnishes like a sprig of fresh mint or a thin orange peel twist can elevate your jam presentation while adding a subtle aroma. These simple touches bring a fresh, vibrant look and make it perfect for gifting or entertaining.
Side Dishes
This jam pairs wonderfully with warm toast, buttery croissants, or creamy yogurt. It also works beautifully alongside cheese — especially soft brie or tangy goat cheese — creating a perfect sweet-savory contrast.
Creative Ways to Present
Try layering the Homemade Orange Jam Recipe into parfaits with granola and fresh fruit or swirl it into plain cake batter for an orange-infused dessert. It’s also fantastic as a glaze for roasted chicken or to brighten up savory sauces.
Make Ahead and Storage
Storing Leftovers
Once cooled and sealed, your jam will keep at room temperature for about a month or longer in the refrigerator. Keep it tightly covered to preserve its fresh citrus aroma and prevent it from absorbing fridge odors.
Freezing
You can freeze your Homemade Orange Jam Recipe in airtight containers for up to three months. Thaw it in the fridge before use to maintain its texture and flavor as much as possible.
Reheating
If your jam thickens too much after refrigeration, a gentle warm-up in a saucepan over low heat will soften it back to spreading consistency. Stir frequently to prevent scorching.
FAQs
Can I use navel oranges for this jam?
Absolutely! Navel oranges are a great choice because they are sweet and seedless, making preparation easier and your jam wonderfully smooth.
Do I have to use a muslin cloth for the seeds and pulp?
Using muslin helps keep the seeds contained while allowing natural pectin to escape, ensuring your jam sets properly without unwanted gritty bits.
How can I tell when the jam is done?
The plate test is your best friend here: cold the jam on a plate for 10 minutes and tip it. If it doesn't run, it’s perfectly done! Otherwise, cook it a bit more.
Is this jam suitable for canning and long-term storage?
Yes, if you pour the hot jam into sterilized, airtight jars and seal them properly, the jam will keep for several months. Just be sure to follow safe canning procedures.
Can I adjust the sweetness in this Homemade Orange Jam Recipe?
Of course! You can reduce sugar slightly if you prefer a tarter jam, but keep in mind that sugar also helps with preservation and texture.
Final Thoughts
Making your own Homemade Orange Jam Recipe is such a gratifying experience because you control every element and end up with a bright, flavorful jam that’s simply better than store-bought. I encourage you to give it a try — it’s an absolute joy to spoon on your morning toast or share with loved ones. Once you taste this vibrant, fresh jam, you’ll never look back!
Print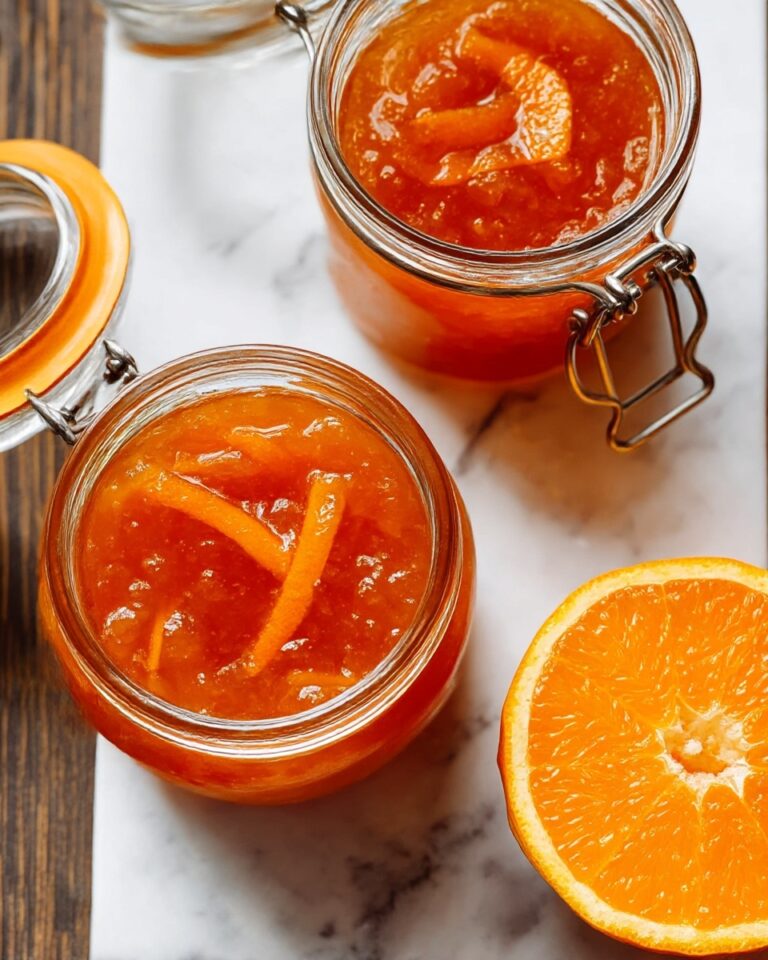
Homemade Orange Jam Recipe
This homemade Orange Jam recipe transforms fresh oranges and lemon into a delightful, naturally thickened spread. Using the natural pectin from the fruit and a perfect balance of sugar, this jam offers a fresh, tangy sweetness ideal for breakfast or desserts. The process includes juicing, peeling, slicing, and slow simmering to achieve the ideal jam consistency without any preservatives, making it a wholesome and delicious addition to your pantry.
- Total Time: 1 hour
- Yield: Approximately 2 cups (2 servings)
Ingredients
Fruits
- 8 large oranges (700 g / 1.540 lbs after juiced and sliced)
- 1 large lemon
Sweetener
- 700 g sugar
Instructions
- Separate Oranges: Put 2 oranges aside to peel and chop later, while the other 6 oranges and the lemon will be juiced.
- Juice Citrus: Cut the 6 oranges and 1 lemon into halves and juice them, allowing some pulp into the juice. Remove and save the seeds without discarding the skins.
- Extract Pulp: Using a teaspoon, scoop the pulp out from inside the reserved skins carefully.
- Make Pectin Bundle: Place the pulp and seeds into a muslin cloth and tie it into a bundle to naturally provide pectin for thickening.
- Remove Bitter Parts: Scrape off the white pith from the orange and lemon skins using a knife or spoon as it can cause bitterness, then discard these parts.
- Slice Skins Thinly: Cut the cleaned orange and lemon skins into thin slices to incorporate into the jam.
- Prep Reserved Oranges: Peel the set-aside 2 oranges, remove all zest and white pith, then chop the fruit roughly.
- Combine Ingredients: In a large bowl, mix the orange and lemon juice, sliced skins, and chopped peeled oranges. Squeeze the muslin bundle over this mixture to release natural pectin.
- Weigh Mixture: Weigh this combined mixture to determine the exact amount of sugar needed (equal weight), then transfer it into a large pot.
- Add Sugar: Add sugar in the exact amount as the fruit mixture weight (700 g), stirring gently.
- Cook Jam: Cook the mixture over high heat, stirring occasionally, for 20-30 minutes until it thickens.
- Perform Plate Test: Lower heat to the minimum and test the jam consistency by dropping a spoonful on a plate and refrigerating for 10 minutes. If jam flows quickly when plate is tilted, keep cooking for an additional 5 minutes.
- Cool Jam: Remove the pot from heat and let the jam cool; it will further thicken as it cools down.
- Store Jam: Once completely cool, store the jam in jars. It keeps well for a month at room temperature or refrigerated.
- Optional Sterilization: For longer storage, fill sterilized jars with hot jam and seal tightly. Properly sterilized, these can last several months.
Notes
- The weight given (700 g) for oranges is after juicing, slicing, and preparation; use a kitchen scale to match sugar quantity exactly to the fruit mixture weight for perfect gel.
- Using the muslin bundle with seeds and pulp provides natural pectin, essential for thickening without commercial additives.
- Scraping out the white pith from the skins is crucial to avoid bitterness in the jam.
- Perform the plate test to ensure the jam reaches the right consistency before stopping the cooking.
- If storing at room temperature without sterilization, consume within one month.
- Prep Time: 30 minutes
- Cook Time: 30 minutes
- Category: Jam
- Method: Stovetop
- Cuisine: International
- Diet: Vegetarian


Leave a Reply